Tuesday, December 30, 2008

Country Living Holiday Collection Stamping Kit

Invite the warmth and coziness of the holidays into your home with Stampin' Up!'s Country Living Holiday Collection Stampin' Kit. This kit has everything you need to create beautiful handcrafted ornaments.

The Holiday Collection Stampin' Kit includes the following products:


  • Holiday Collection stamp set (six stamps)
  • Four 12" x 12" sheets of die-cut chipboard
  • Eight 12" x 12" sheets of die-cut Designer Series paper (2 ea. of 4 double-sided designs
  • Four 12" x 12" sheets of Designer Series paper (2 ea. of 2 double-sided designs)
  • Two 12" x 12" sheets of Whisper White card stock
  • 25 yds. Silver Metallic cord
  • 10 yds. 3/8" Whisper White taffeta ribbon
  • Pretties Kit brads (20)
  • Stampin' Dimensionals
  • Dazzling Diamonds Stampin' Glitter (1/2 oz.)
  • Tombow Multi Purpose Adhesive
  • Riding Hood Red Classic Stampin' Spot
  • Old Olive Craft Stampin' Spot
  • Uninked Stampin' Spot
  • Whisper White Craft Ink refill
Download the Flyer.

Have you seen the Country Living Magazine Special?

List of Coordinating Products

Item Number Page Description Price
112844 11*Old Saint Nick Rub-Ons $10.95
113680 14*On Board Trinkets Ornaments $24.95
113681 15*Star Bright Designer Series Paper Ornaments $19.95
112843 17*Season of Cheer Rub-Ons $10.95
113100 23*Alpine Ribbon Originals $14.95
113099 23*1-1/4" Riding Hood Red/Very Vanilla grosgrain ribbon $8.95
111836 162Riding Hood Red Classic Stampin' Pad $5.25
111839 162 Riding Hood Red Classic Stampin' Ink refill$2.75
101731 163 Whisper White Craft Stampin' Pad $7.50
101780 163 Whisper White Craft Stampin' Ink refill $4.25
103063 164 Old Olive Craft Stampin' Pad $7.50
101425 164 Old Olive Craft Stampin' Ink refill $4.25
108362 184 Crop-A-Dile $29.95
109114 185 Pretties Kit $29.95
101227 188 1/16" Circle punch $8.95
104401 188 1-3 /8" Circle punch $15.95
108797 190 Chunky Essentials Stampin' Glitter $15.95
105021 193 White Uni-ball Signo gel pen $3.95
102283 193 VersaMark pad $7.50
114447 n/aHoliday Collection Stampin' Kit$49.95

*From Holiday 2008 Mini Catalog


If you'd like to order any of these products you can email me to place you order or click here to order online. Please use my name as your demonstrator.

Sunday, November 30, 2008

Rub-On Some Cheer Promotion


Dates: November 10-30, 2008

Promotion Details:
Spend $20 and qualify to purchase any Rub-Ons assortment at 20 percent off ($8.76 per package; regularly $10.95):

Promotion Details:
Spend $20 and qualify to purchase any Rub-Ons assortment at 20 percent off ($8.76 per package; regularly $10.95):

Item # Page # Rub-Ons Description
111416 178 Chateau Bella
111417 178 Word Flurries
111414 178 Hidden Garden
111277 178 A Perfect Day
110283 179 Take Note
111806 179 Chills & Thrills
111804 179 Chit Chat
111415 179 Greatest Moments
111805 179 School Days
110282 179 Anchored
112844 11* Old Saint Nick
112843 17* Season of Cheer
110283 39** Hidden Garden Blossoms

*From Holiday 2008 Mini Catalog

**From Celebrando Creatividad

Download the flyer here.

Friday, October 31, 2008

Online Ordering is Now Available


Online Ordering is now available from Stampin' Up! At the right on the sidebar, I will be showing a picture of what the current catalogs look like, with a "click here" link. The link will take you directly to the customer online ordering page. Once there you will need to:
  • Click on Customer Log In on the right top.
  • If you have shopped online before at stampinup.com, click on returning customer...if not, click on Create An Account.
  • Fill out all of the information, and when you get to the bottom of the form, please make sure you click on Yes to the question, "Do you already have a demonstrator."
  • (Tip: the form filler doesn't like periods, so don't use them)
  • The next page will bring you to the Demonstrator Finder/Demonstrator Directory. Since I DO NOT HAVE a Demonstrator Business Website (DBWS), you will need to key my information in on the right side under Demonstrator Directory.
  • If you put in my name...Janet Reid and KY, my name should come up. My contact information is there. You can also click on Continue Shopping.
  • From there, you will be taken to the online store. You can then browse thru the Online Catalogs, and view everything that Stampin' Up! has to offer. There is also a section on projects so that you can view some creative ideas.
  • When you begin to view the catalog prices, you will see 2 different prices. As long as you chose a demonstrator (hopefully me), you will receive the discount pricing. If you choose to place an order without using a demonstrator, your cost and the cost of shipping will be more.
Note: if you choose to order online, that is okay, because if you are like me, I love the convenience of online ordering. If you choose to place an order by phone or email as you always have, that works out better for me. As I do not have a DBWS, I will not get the full 20% of the sale as I would with a phone or email order. Online ordering = 10% extra income to me, vs Phone or Email = 20% extra income to me. Whatever works best for you is fine with me. :)
***********************************************************************************************************************************************************


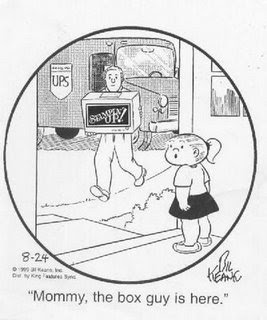
MOM! UPS IS HERE!!!


I just love it when the UPS man delivers stamps to my door. Now you can share my excitement too! When you place an online order, your UPS man will deliver Stampin' Up! directly to you at YOUR door.

Sunday, October 12, 2008

Flip Flop Album


This is the front cover.


This is the back cover.

Not sure which pages go in which order here, but the following pages, are what was inside.
I say WAS because I gave this album to my "roomie" this summer in a NCG'er swap. I'd also like to thank my good friend Rose (Hi girl!) for explaining the directions for this project. She was kind enough to send me pictures of her completed work so I could figure this thing out. This was a difficult project to photograph as there are so many little pages to capture when you turn the pages.


I was wanting to try this project for a long time, and I think I'll make another one some day, possibly in a class, but it was definately a LOT of work. I'm not a scrapbooker by nature, so I think just trying to come up with page layouts was the hardest part for me. Hope you enjoy this project. If you are interested in a class to learn how to make this, please email me and let me know.


Saturday, October 4, 2008

Zindorf Technique Card

oops! Another crooked scan. I hate that, especially when this was my ultimate favorite card to make. I've been in awe of the many cards being made using the Zindorf Technique (named after the awe-inspiring...Michelle Zindorf). Her work is really amazing. If you get a chance, go check it out. According to a tutorial on SCS for this technique, you are supposed to use a rubber brayer. I didn't have much success when I did it that way, so I used a sponge brayer. I really like the effects that this made, so even though this was a first attempt, I'm going to work at it some more, as I like how it turns out.

Stamp Sets: Lovely as a Tree, Wanted, Sincere Salutations
Ink: Bashful Blue, Bordering Blue, Not Quite Navy, So Saffron, More Mustard, Really Rust, Basic Black
Accessories: Sponge Brayer
Other: post it notes (for masking)


All Occasion Card Class Cards (part 2)

Sorry the scan is a little bit crooked. On this card, I used the new In Colors for this year. I simply LOVE, LOVE, LOVE, the Kiwi Kiss and Pacific Point together. On this card (although you can't see in the scan), I dry embossed the little flowers.

Stamp Sets: Seeing Spots
Classic Ink: Pacific Point, Kiwi Kiss
Card Stock: Whisper White, Pacific Point, Basic Black, Kiwi Kiss
Accessories: Scallop Circle Punch, Scallop (Edging) Punch, 1 1/4" circle punch, 1 3/8" circle punch, brass stylus for "Seeing Spots", light box, embossing tool.

No, your eyes aren't playing tricks on you. You really are Seeing Spots. Ar! Ar! Ar! Sorry. Had to throw that in somewhere. This was an easy card to make. A 10 minute or less one.

Stamp Set:Seeing Spots
Card Stock: Summer Sun, Real Red, Tempting Turquoise, Whisper White, Green Galore
Classic Ink: Tempting Turquoise, Real Red
Accessories: 1 1/4" circle Punch, 1 3/8" circle punch, Scallop punch, paper piercing tool.


All Occasion Card Class Cards

Wheww! What a relief! We have a filter on our pc to prevent the kids from accessing sites they shouldn't, and when trying to upload these first 2 cards as a final post, it read error. I thought..."NO!!!!" "Please be there when I log back in, please be there!" Thank goodness it was. Who knows when I would take the time to upload again.

I had a card class after school yesterday, which is the first one I've had in a long time. I've uploaded several of the cards tonight, but they didn't lay in the post quite right, so I will try to upload again.

This card is an example of Paper Piecing. I hadn't tried this technique until now, but with all the pretty dsp's, I thought it would be a good technique to try with the class.

Stamp Set: Fast and Fun Notes
Card Stock: Apricot Appeal, Basic Black, Mellow Moss, Whisper White, DSP (retired)


This little guy was a lot of fun to make. I've named him "Punchy", as it only requires SU punches to create him. I dug down deep in my retired stamps closet and found the Halloween saying to add in the corner. I got the idea from someone on SCS (although I'm not sure who).

Stamp Set: ?
Punches: Scallop, Photo Corners, 3/4" circle, 1/4" circle
Other: gel pen
Card Stock: Basic Black, Green Galore, Whisper White, Real Red, Tangerine Tango


Thursday, July 31, 2008

More Roomie Box Items to Share


Here are a couple more shares that I put in the swap box for my "roomie". The first is a bag in a box which I put some chocolate treasures. I wasn't sure what kind of shape the chocolate would be in once it reached Cincy having been in a hot postal truck, but she said it was fine. I guess it didn't have too much time to melt really bad, just going 100 miles or so. You can find the tutorial at Diana Gibbs' blog. It was really easy to make and is a great little bag to put small gifts in.

The 2nd picture is a different kind of post it note holder. This holds the mini post-its. You can see the tutorial for this project at Angie Juda's tutorial blog called Stampin' Academy. The instructions are easy to follow and make a cute little gift for SOS (someone special) ; )

Tuesday, July 29, 2008

Long Time, No Share...I'm Back Though


I know it's rather sporadic when I take the time to share. Somehow though, I've lost my stamping mojo, and just haven't felt like it lately. To be truthful, until this past weekend, I haven't stamped since March. Don't really know why, but I just haven't. I joined a Not Going to Convention group on Yahoo called VC Rocks, and only joined 1 swap...the Hotel Roomie Swap. What we had to do was make a goody box for our "roomie" in the Virtual Hotel. Things that we would give our real roomie if we were going to convention. I always have alot of fun with this type of swap, and typically will go overboard. Anyhow...the things I'm sharing here, are the things I sent to my roomie.

Even though my roomie and I have sent each other our boxes, I'm hoping to meet her IRL this weekend.
As a result of this swap, I found out she lives not 5 miles from my mom up in Cincinnati.


SO...this fancy fold card. I learned how to do this from a creative stamper named Dawn Griffith. You can view her tutorial here.

For this project, I used all Stampin' Up! supplies (of course) ! I used the soon to be retired Bali Breeze Designer Paper, Tempting Turquoise CS, Certainly Celery CS, and Whisper White CS. I also used the Stitched Exotics and Define Your Life Stamp Set.
**********************************************
**********************************************
**********************************************


Who knew??? Adding 1 little picture to this post could mess up the whole thing. Maybe that's why I don't post too often. It's alot of work.

This little card was also enclosed in my swap. I will have to search my list of blog sites to find out who inspired this one. I know I saw a tutorial somewhere so I will include it when I find it.

The base of this card is Pale Plum with Certainly Celery layered on top. I then stamped the large flower from the Stitched Exotics stamp set on Basic Black CS with white Craft Ink. When it dries, you color the white with (soon to be retired) metallic pencils. Go over certain parts of it with your white gel pen to give it more depth. I used silver metallic CS to make the tag with the oval punches, 3/4" circle punch and 1/4" circle punch, ran some Celery ribbon through and Voila!

That's all for now. I'll share the other things tomorrow.


Monday, June 9, 2008


One more share for the evening. This was a picture frame I picked up at Target's Dollar Spot awhile ago. It was black with the ribbon on it. I simply added Stampin' Up! rub on's that I got from the Sale-A-Bration catalog. This was given to someone at my son's Scout Spaghetti Supper Fundraiser.

A note on the fundraiser. My son (15) is working on his Eagle Scout Project at the current time. His project is a Relay for Life team at our local relay, later this month. At the spaghetti supper, he raised over $250 for his team, by having drawings for items donated from area businesses as well as a silent auction on a big donated item. His goal for this big event is $2000 and he's about half way there with only 2 more working weeks for him to collect. Check out the link at the top of this page. Any donation would be welcomed!

Altered Paint Can B-day Present


I altered the Paint Can for a b-day present for my niece. I had made 2 of these for my older nieces for Christmas and Kelly (9) liked it so much, I made one for her birthday. On the side is snowman confetti for the bath. Inside, I put hair scrunchies, bands, nail polish, nail art, lotions, and bath gel. On the top of the can is a big "K" for Kelly!


This was a gift I made or should I say altered for someone. I got the picture album from Big Lots for $3. I added some of Stampin' Up!'s Designer Series Paper to it, scuffed up the edges a bit, and added a chipboard accent after embossing it with Black Embossing Powder several times to give it a metallic look.

Share of Yummy Cake

Since I haven't shared anything for an OH so long time, thought I'd share a yummy cake recipe with you. I recently took this to a scout spaghetti dinner fundraiser, and not a crumb was left in the pan. It is SO easy!!!

You will need:
  1. 1 Yellow cake mix
  2. 1 can of Eagle Brand Sweetened Condensed Milk
  3. 1 Can of Pina Colada Mix (Creme de Coco)
  4. Small tub of Cool Whip
  5. 9x13" cake pan

  • Take cake mix, and mix according to the directions on the box.
  • While cake is baking, mix Pina Colada mix and Eagle Brand together.
  • Remove from oven and while still HOT...poke holes with a wooden spoon all over the cake.
  • Pour EB and Pina Colada mix over hot cake, then refrigerate for 3-4 hours.
  • Before serving, spread whipped cream over top of cake.
Yum!!!

Thursday, February 21, 2008

I tried to add these pictures yesterday. I downloaded them, typed up what I wanted to write about, and stepped away from the pc for a few minutes. Unfortunately in that time, there was some sort of glitch, and what took considerable time to write the first time, I lost. SO...here goes again.

These 2 additions are from a card class I did last weekend. This first card was a super SIMPLE card. Gotta LOVE that kind!

Card Stock: So Saffron, Ballet Blue, Whisper White
Stamp Set: Fun and Fast Notes

How To's: Stamp image of choice on Whisper White with Basic Black Classic Ink. Color in using Watercolor Crayons and Aquapainter. Layer on Blue CS. Next, I cut a piece of chipboard to a size, slightly larger than the blue cs.
I placed the chipboard, under the So Saffron cs (Hint: Hermafix on the chipboard, helps keep it in place). Using an embossing tool, I embossed around the chipboard to create an embossed frame for the image. Voila!


This card ended up a bit more complicated. It started with a Pixie Pink base with Basic Black layered on top. The scalloped edge was created using the Slit Punch and then, using the handheld 1/8" punch, cut holes in each scallop. I stamped the flower using the SAB set So Many Scallops which works GREAT with the Scallop Punch . I then stamped a small flower from the Little Flowers Stamp Set for the center and punced out with 3/4" punch. The word set is also from the SAB flyer and I stamped that with Pink Passion to match the flower and punced out using large tag punch. (All these are linked to the same pages as above).

I wasn't thrilled about how this particular card turned out, but I guess the class liked it, as I sold 3 scallop punches.

I suspect the kids will be out of school AGAIN tomorrow (and possibly even earlier than the scheduled release time today). The weathermen are saying we are to get freezing rain later today. The temp is supposed to rise tomorrow, above freezing, but I suspect the kids will be off of school due to the frozen roads.

Here in KY, we've had a most mild winter. Cold temps, but just a small dusting of snow, when there has been snow. School has been cancelled 6 days so far. (4 for weather, 2 for illness) Those are days that will need to be made up at the end of the year. It's still only February, and I suspect those numbers will increase, before winter is truely over. If they are going to miss school for bad weather, it would be nice to get just 1 REAL SNOWSTORM. We have not had a really good snow for several years now. They miss for bad weather, but a "dusting" of snow does not really constitute for a Snow Day in my opinion.

Wednesday, January 30, 2008

Catalog CASE


This card and the next one are direct CASE's (Copy And Share Everything) from the new Spring Catalog. The colors are the same, however I changed up on the sets used.


For this one I used:


Time Well Spent (stamp set), Pumpkin Pie, Rose Red, Whisper White (card stock), watercolor crayons, and white gel pen.


This one I used the Stamp Sets So Much and Time Well Spent. Card Stock- Certainly Celery, Bashful Blue, Rose Red, and So Saffron DSP. I used a Wal-mart grommet in the center of the flower, and added a small punched out circle of So Saffron to pick up that color again. I added some Crystal Effects and Dazzling Diamonds glitter to the center for an extra "Bling".


Just 1 of my holiday cards that DIDN'T get sent out


This is a card I made during the holidays.

Stamp Set: Crab and Company

Ink: Real Red, Basic Brown

CS: Real Red, Certainly Celery, Night of Navy, Whisper White, DSP (Designer Series Paper)

Other: Liquid Applique, Word Window Punch. brads

I made several Christmas cards during the holidays, but unfortunately no one got to see them. (psst...dh is a bit peeved about that...that I didn't mail them out, anyway). I looked at it this way, with the price of gas topping $3 a gallon again, and postage costs they way they are, do I really want to send out all these cards, or do I want to feed my family??? DH didn't see it that way, however, as he shook his head in disbelief and found just 1 more little reason to be mad at me this year (2008), no one but me got to enjoy my Christmas cards this holiday season.

Thursday, January 24, 2008

Cuttlebug Flowers


Altered Envelope Swap


This was an altered envelope swap that I participated in last year.

Altered Paper Project


This was a project I made last summer for a swap, when the designer paper first came out. You can view a Tutorial for this project at CraftTVWeekly. It is FREE to join up, and they have wonderful papercrafting projects. If you look for this project, you will find it shown as a picture frame that sits on a tabletop. I altered it a bit so it could be hung up.
Stamp Sets: Heartfelt Thanks
Paper: Certainly Celery, Almost Amethyst, Whisper White, and Double Sided Designer Series Paper
Ink:Certainly Celery, Almost Amethyst, More Mustard, and Rose Red

Attempting to Catch Up

I've decided to start this blog over again. I've changed the name, and am currently trying to build different elements in here again. I'm not very good at writing every day, like some you ladies, and noticed that until this small post, my last post was in September. I've rather lost my stamping mojo. Don't know why this is, but unless my upline plans a stamping day, I've not done much stamping lately. Anywhoooo....I deleted a lot of the small talk that started up my last blog, AND eliminated the chit chat about my hermit crab. We might add more about him at a future time. At the current time, my site has a few outdated cards posted using several retired sets. I've also found that trying to write on 1 blog for my customers, and one blog for stampers is for the birds. I just can not keep up. After a year of trying this, I do believe blogger is more user friendly than Wordpress, so hopefully my customers will find me here.

If anyone who reads this would like to BECOME a customer to me, or a demonstrator for that matter, check out the contact info on the right.