Friday, October 31, 2008

Online Ordering is Now Available


Online Ordering is now available from Stampin' Up! At the right on the sidebar, I will be showing a picture of what the current catalogs look like, with a "click here" link. The link will take you directly to the customer online ordering page. Once there you will need to:
  • Click on Customer Log In on the right top.
  • If you have shopped online before at stampinup.com, click on returning customer...if not, click on Create An Account.
  • Fill out all of the information, and when you get to the bottom of the form, please make sure you click on Yes to the question, "Do you already have a demonstrator."
  • (Tip: the form filler doesn't like periods, so don't use them)
  • The next page will bring you to the Demonstrator Finder/Demonstrator Directory. Since I DO NOT HAVE a Demonstrator Business Website (DBWS), you will need to key my information in on the right side under Demonstrator Directory.
  • If you put in my name...Janet Reid and KY, my name should come up. My contact information is there. You can also click on Continue Shopping.
  • From there, you will be taken to the online store. You can then browse thru the Online Catalogs, and view everything that Stampin' Up! has to offer. There is also a section on projects so that you can view some creative ideas.
  • When you begin to view the catalog prices, you will see 2 different prices. As long as you chose a demonstrator (hopefully me), you will receive the discount pricing. If you choose to place an order without using a demonstrator, your cost and the cost of shipping will be more.
Note: if you choose to order online, that is okay, because if you are like me, I love the convenience of online ordering. If you choose to place an order by phone or email as you always have, that works out better for me. As I do not have a DBWS, I will not get the full 20% of the sale as I would with a phone or email order. Online ordering = 10% extra income to me, vs Phone or Email = 20% extra income to me. Whatever works best for you is fine with me. :)
***********************************************************************************************************************************************************


MOM! UPS IS HERE!!!
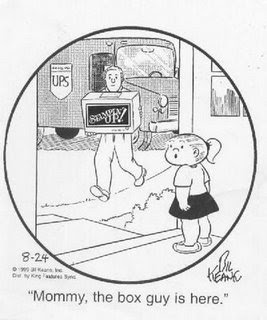

I just love it when the UPS man delivers stamps to my door. Now you can share my excitement too! When you place an online order, your UPS man will deliver Stampin' Up! directly to you at YOUR door.

Sunday, October 12, 2008

Flip Flop Album


This is the front cover.


This is the back cover.

Not sure which pages go in which order here, but the following pages, are what was inside.
I say WAS because I gave this album to my "roomie" this summer in a NCG'er swap. I'd also like to thank my good friend Rose (Hi girl!) for explaining the directions for this project. She was kind enough to send me pictures of her completed work so I could figure this thing out. This was a difficult project to photograph as there are so many little pages to capture when you turn the pages.


I was wanting to try this project for a long time, and I think I'll make another one some day, possibly in a class, but it was definately a LOT of work. I'm not a scrapbooker by nature, so I think just trying to come up with page layouts was the hardest part for me. Hope you enjoy this project. If you are interested in a class to learn how to make this, please email me and let me know.


Saturday, October 4, 2008

Zindorf Technique Card

oops! Another crooked scan. I hate that, especially when this was my ultimate favorite card to make. I've been in awe of the many cards being made using the Zindorf Technique (named after the awe-inspiring...Michelle Zindorf). Her work is really amazing. If you get a chance, go check it out. According to a tutorial on SCS for this technique, you are supposed to use a rubber brayer. I didn't have much success when I did it that way, so I used a sponge brayer. I really like the effects that this made, so even though this was a first attempt, I'm going to work at it some more, as I like how it turns out.

Stamp Sets: Lovely as a Tree, Wanted, Sincere Salutations
Ink: Bashful Blue, Bordering Blue, Not Quite Navy, So Saffron, More Mustard, Really Rust, Basic Black
Accessories: Sponge Brayer
Other: post it notes (for masking)


All Occasion Card Class Cards (part 2)

Sorry the scan is a little bit crooked. On this card, I used the new In Colors for this year. I simply LOVE, LOVE, LOVE, the Kiwi Kiss and Pacific Point together. On this card (although you can't see in the scan), I dry embossed the little flowers.

Stamp Sets: Seeing Spots
Classic Ink: Pacific Point, Kiwi Kiss
Card Stock: Whisper White, Pacific Point, Basic Black, Kiwi Kiss
Accessories: Scallop Circle Punch, Scallop (Edging) Punch, 1 1/4" circle punch, 1 3/8" circle punch, brass stylus for "Seeing Spots", light box, embossing tool.

No, your eyes aren't playing tricks on you. You really are Seeing Spots. Ar! Ar! Ar! Sorry. Had to throw that in somewhere. This was an easy card to make. A 10 minute or less one.

Stamp Set:Seeing Spots
Card Stock: Summer Sun, Real Red, Tempting Turquoise, Whisper White, Green Galore
Classic Ink: Tempting Turquoise, Real Red
Accessories: 1 1/4" circle Punch, 1 3/8" circle punch, Scallop punch, paper piercing tool.


All Occasion Card Class Cards

Wheww! What a relief! We have a filter on our pc to prevent the kids from accessing sites they shouldn't, and when trying to upload these first 2 cards as a final post, it read error. I thought..."NO!!!!" "Please be there when I log back in, please be there!" Thank goodness it was. Who knows when I would take the time to upload again.

I had a card class after school yesterday, which is the first one I've had in a long time. I've uploaded several of the cards tonight, but they didn't lay in the post quite right, so I will try to upload again.

This card is an example of Paper Piecing. I hadn't tried this technique until now, but with all the pretty dsp's, I thought it would be a good technique to try with the class.

Stamp Set: Fast and Fun Notes
Card Stock: Apricot Appeal, Basic Black, Mellow Moss, Whisper White, DSP (retired)


This little guy was a lot of fun to make. I've named him "Punchy", as it only requires SU punches to create him. I dug down deep in my retired stamps closet and found the Halloween saying to add in the corner. I got the idea from someone on SCS (although I'm not sure who).

Stamp Set: ?
Punches: Scallop, Photo Corners, 3/4" circle, 1/4" circle
Other: gel pen
Card Stock: Basic Black, Green Galore, Whisper White, Real Red, Tangerine Tango